Monday, November 21, 2011

Weekly WIP - Clare (Part 2)

Wasn't really feeling the Strike Freedom project this week. So I figured I would work the Clare project until my gunpla mojo returns.

What I'm working on...
Since you last saw this kit (WIP 1), I finished the little bit of clean up that needed to be done and then re-primed the kit. I am using grey Krylon primer. Works pretty great, but mother nature didn't seem to like it. As I was priming is started getting pretty windy. I was applying a second coat to make sure I got the entire kit covered when a gust of wind blew all of my piece off the table and crashing to the ground. Luckily, nothing was damaged. The Krylon dries pretty fast so only 2 or 3 pieces had any noticeable defect. Nothing a little sandpaper couldn't fix.

With that mess over, I was able to start painting. For this kit, I am going to try shading for the first time. Going for a real subtle shade. First up, the white clothing. I used a mixture of Gloss White and RAF Medium Sea Grey for the base coat. 


Then I hit it with plain gloss white. For the first coat, I did a light misting over the entire kit.Barely any white could be seen at this point. Then I went over all of the raised areas with 2 coats of gloss white. Lastly I did another misting coat to blend the grey and white. I think the end result looks pretty good.


Up next, the face. Lot going on here. First coat was Light Flesh. Clare in very pale so I didn't want to start with a dark base. Turns out, I probably went too light on the base coat. After that, I used a mixture of white and Basic Skintone. I hit the raised parts with the first to coats and then a light mist coat to blend. Lastly, I went over just the raised parts with a mixture of white and Highlights Flesh. 


I'm not entirely pleased with this result. The shading didn't really come through. Since I don't want to re-paint it, I think I'm going to try using a wash. Hopefully that will fill in the lowered areas and give it some depth.


Next up the hair. First I tried a mixture of Gloss White and Cadmium Yellow Light. This color did not work at all. Way too bright. Attempt #2 was a mixture of Cadmium Yellow Light, Bristish Bulg LT Stone, and RAF Medium Sea Grey. Seemed to be a pretty good base color. After that I added a little Gloss White to lighten it up. 


My shading didn't work so well on this part. I think I got carried away with the mist coat. I'm going to try a wash on this too to see if that can improve the situation. 


Lastly, I tackled the steel armor. First I went over the parts with 3 coats of Gloss Black Base. I followed that up with 3 coats of Klear Koat. After that, I buffed out every piece so they were as smooth and I could get them. Then I went over them with 3 light coats of Steel.


This is what they look like now. A little darker than expected, but that's ok. The pieces are also very dull. Hopefully after some buffing and polishing I get the effect that I'm looking for.


What else I'm into...
South Park. I love this show and last week's episode is a great example of why. Over the top, offensive, and  very funny. And as a cherry on top, lots of your momma jokes. Seriously, who doesn't love those.


Thursday, November 17, 2011

Builds to Watch - Dragon Ronin Astray by MatanglawinX

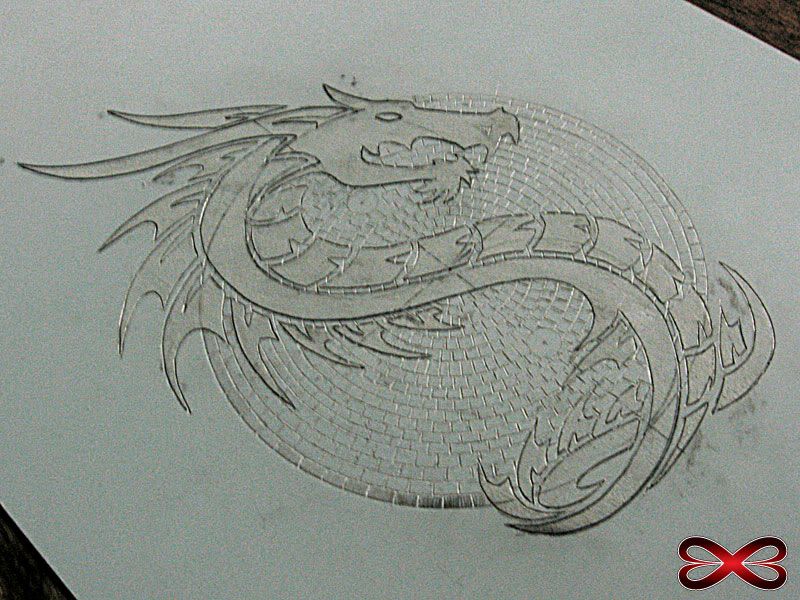
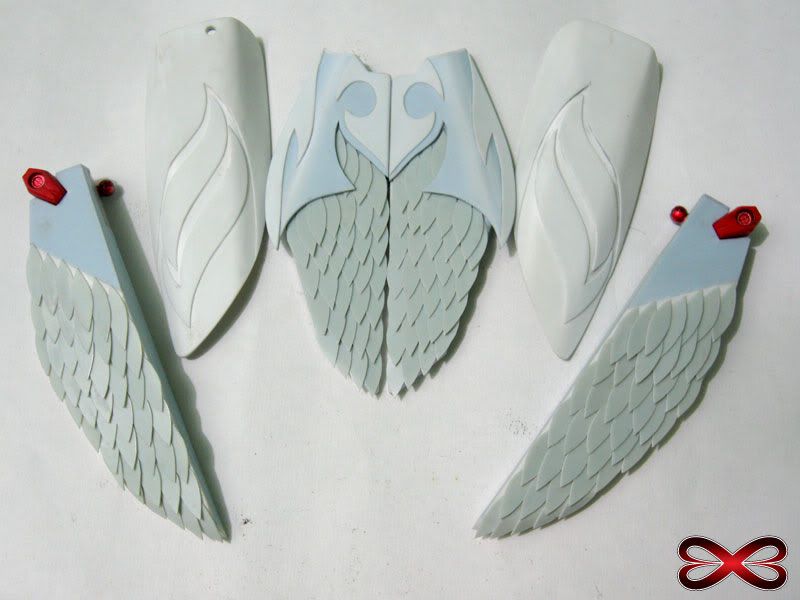
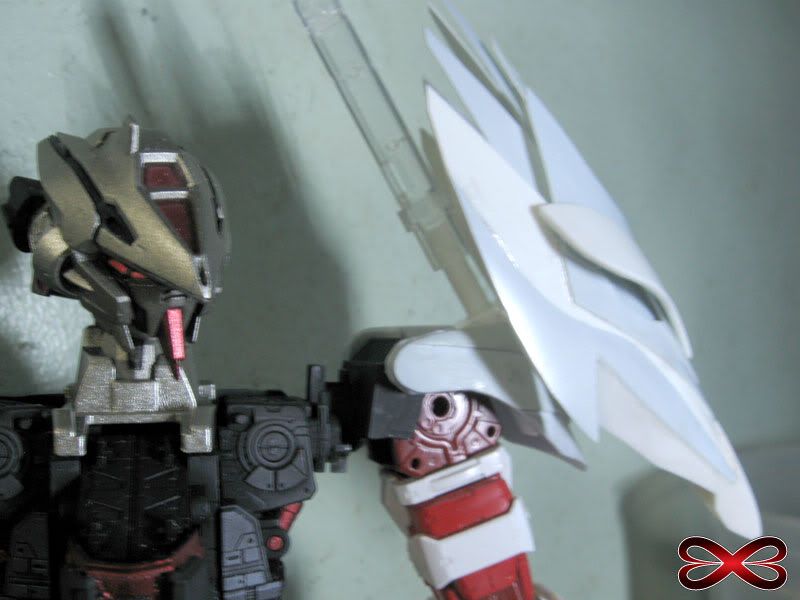
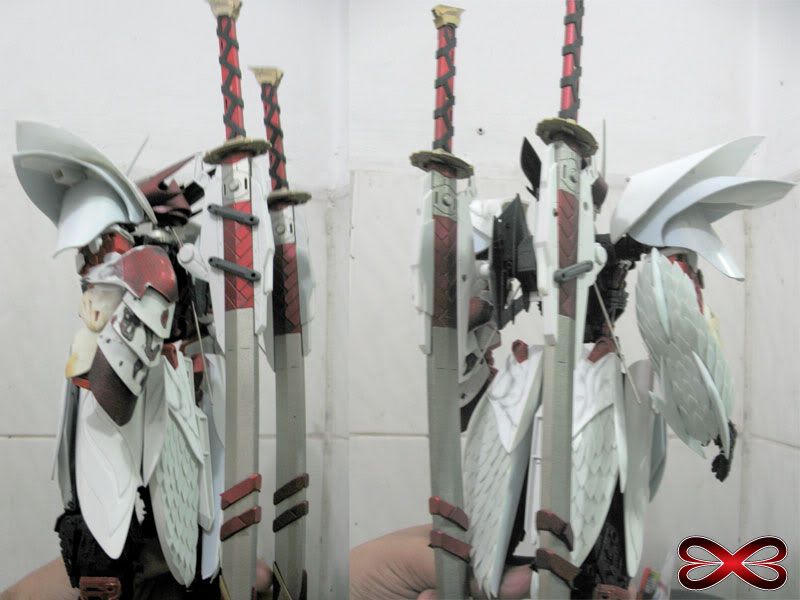
If you haven't seen this kit check out the WIPs on MatanglawinX's Blog. When I ran across this I was totally blown away. The base, the dragon armor, and the shoulders... all amazing. Don't believe me? Check out the images below.


In my opinion, this kit looks unbelievable. MatanglawinX, I wish you luck on this amazing project. Can't wait to see the end result.

Monday, November 14, 2011

Kit Building - Kotobukiya M.S.G. Gatling Gun

So the weather stinks today, so I decided to start a new segment on my blog which I will call Kit Building. My favorite part in the model building process is building the kit. Lucky for me, with any "completed" kit, I get to do this twice, final assembly and the initial snap fit. So from time to time, I just like putting a kit together with no intention on painting it right of way. In these Kit Building post, I'll go over the steps in the building process and my opinion of the final result.

With the intro out of the, it's time to start building. Today I'll be working on the Kotobukiya Modeling Support Goods Gatling Gun. Check out the unboxing here.

Step 1 - Looks like we're starting around the wind up gimmick and building around it.


Step 2


Step 3


Step 4


Step 5


Step 6 - A half dozen pieces and 5 steps later, the wind up gimmick is finished. Time to turn this into a gatling gun.


Step 7


Step 8


Step 9 - The basic shape of the gun is done. Time for the detailed parts. First up, an ammo pack.


Step 10 - Then the top handle.


Step 11 - Next up the gun handle.


Step 12 - Lastly, add on all of the details.


Size Comparisons
Since there is no scale for these kits, size comparison is important. First up, with a 1/100 NG Exia.


Personally, I think 1/100 scale is the right scale for this kit.

Next up, an older 1/44 HG Zaku II.


The gun is about the same size as the mobile suit. Not really appropriate to match these in my opinion.

Lastly, compared to an SD Unicorn and Hyaku Shiki.


Ok, this obviously isn't made for SDs. But I think you could make a pretty interesting "base jabber" type craft with 2 of them. Would probably fit a 1/144 scale kit too...

Final Result:

I've got to say, I like this kit. The wind up gimmick is fun. The detail on the kit is pretty good. All of the parts snapped together and fit like they should. My only complaint is that I don't have a kit to use it with at the moment. 

What's in the box? - Kotobukiya M.S.G. Gatling Gun


Purchased this guy a few months ago to see what Kotobukiya's Modeling Support Goods are like. I've heard that these mini kits are pretty good so I felt like trying one out. So what comes in this little package?


A card stock backing with instructions...


And 3 runners and a white piece that controls the rotation gimmick.


Well that's about it. Parts look pretty good. I see no issues beyond those you would find in a Bandai kit. Plastic looks and feels like that of a Bandai kit. The wind up piece works. At the pre-assembled stage, I see no reason not to recommend this kit.

Sunday, November 13, 2011

Weekly WIP - MG Strike Freedom (Part 9)

What I'm working on...
Finally got to do some final assembly (probably my favorite part). Finished the chest. 


Not to happy about the deacls, but I'm pretty pleased with the rest. It's not perfect but it's probably some of my best work to date. 

Next up, I got to assemble the leg. From the front it looks pretty good. The gold paint is thicker than normal paint so a lot of the frame parts are very stiff. I broke 2 parts trying to get them to fit together. Also makes it hard attach the armor. On the plus side, no glue necessary. Those parts are not coming off. 


From the front it looks good. Just noticed that the ankle armor isn't right. There is some gold that needs to be added. Looks like I'll be doing that by hand. The back needs some work too. Need to do some seam line removal on one part. Once that's done I think I'll have something pretty nice.


Since I only have one leg done, I can do before/after shots.


I'm pretty pleased with this. The red, white, and blues look really good, but more importantly is the gold. Looks great shinning through the flat armor colors. The wash brings out a lot more detail too. I'm pretty happy with the outcome. 


Currently sanding and cleaning the one of the arms, one of the guns, the other leg, and the back pack. Lots of seem lines on the gun and a huge one going all the way around the back pack. But I'll go into that next week.

What else I'm into...
Great Lakes Christmas Ale! So it's pretty tough to find. You can only find this in north east Ohio and even then it sells out pretty fast. But if you can over come all that, give it a shot. It's really good.


Sunday, November 6, 2011

Weekly WIP - MG Strike Freedom (Part 8)

After a little unplanned hiatus I'm back at work on the Strike Freedom!

What I'm working on...
Got the inner frame for the chest and one of the legs painted. Still need to gloss coat, then panel line, then gloss again before taking pics. Also got the armor for the chest and one of the legs mostly painted. The dark blue looks bad in the photo, but that's actually the paint catching the light. The purple is actually a semi metallic purple. When it's hit with a flat coat, the end result should look good (check out the base below).


Gloss coated and did the decals too. They're setting better than they did on the waist section, but it's still not going on right. Micro Set/Sol worked with the decals I got from Samuel Decal, but they don't seem to be working with the Bandai ones. Going to take a trip to the local hobby shop before I do any more decals to see if there are other solutions.


The leg has one bad seam line. My plan is to paint the frame, paint the armor, attach the armor, mask off the exposed frame, remove the seam line, and lastly repaint the armor. This is the best solution I can come up with.  


On the positive side, I finally got the base done. My masking skills need some improvement, but with a little touch up, I think it looks ok. Since it's the base, I'm hoping it wont draw too much attention. At a distance, the base looks pretty good, but up close the defects are pretty noticeable. 


What else I'm into...
The Walking Dead. Both the show and the comic. I love the show. Lots of exciting twists and turns. That being said, the comic book is better. More zombies, more surprises, and Michonne! She is awesome. If you haven't checked out the Walking Dead, you really should give it a shot.