Thursday, September 29, 2011

What's in the box? - Wonder Woman

Received a new resin figure today. It is a figure of Wonder Woman (purchased from e2046). I've been a fan of Marvel and DC Bishoujo figures so when I found one I could actually paint I was pretty excited. I've also pre- ordered the Psylocke one as well. Still waiting on that one though. Now on to the box.


Unlike my previous one, the box is in prefect condition. There's what I'm discovering is the usual stuff on top. Instructions/parts list...


and a picture.


Then there are the parts.


The spears appear pretty warped. Hopefully that isn't a big issue. Casting seems pretty good. There aren't any noticeable imperfections. But I'll hold off final judgement until I actually get to work on a resin kit. Seems odd that the hair is a clear plastic. Not sure what that's about. Hopefully it wont cause any problems.

So if you've been following the blog you know that I've ordered and received a few resin kits in the past two weeks. I've avoided describing my impressions of the package because I didn't know what to expect. But now that I've opened a few I've developed a reasonable opinion of what I expect to see when I open a kit.
  • Large parts sheet. I like the parts sheet that got with the Kanu kit. It's a photo of the parts laid out in actual size. Makes it very easy to see if you have all of the parts.
  • Instructions. I got those with Clare and Wonder Woman, but not Kanu. It's not really a necessity as building a figure is fairly intuitive but there may be a stray part that I have no idea what to do with.
  • Colored photos. Yes, plural. I've been pretty disappointed that there isn't at least a front and back photo. 
  • Quality parts. I'm still getting a feel for resin, but I think I have a good idea of what a good casting looks like. 
  • Bonuses. I like how the Clare kit comes with two different arms. Or how the Clare and Wonder Woman kits come with bases.
In addition to describing what's in the box I'm going to give my impression of the future packages.

Wednesday, September 28, 2011

What's in the box? - Kanu Unchou

The second of my resin kits has arrived. It is a figure of Kanu Unchou (purchased from e2046). No idea what series she's from or what makes her special enough to get the resin figure treatment, but I couldn't resist this kit. Nice to see an attractive looking figure that isn't in a school girl uniform or nude. That said, let's move on to the box so you can see what I'm talking about.


Was a little worried to open this as the box was a bit broken. But before I can check the parts, there's some stuff on top. There's a parts list...


and a color photo of the kit.


Since I don't know who this is, and therefore I have no attachment to the standard color scheme, I have a few ideas on how I'll repaint it. Now on to the parts.


Despite the broken box they all seem ok, except one. Seem broken but I don't actually know what it goes to. I think it might be an earring or something. The broken part is flat so it's an easy fix once I figure out what it is.


Doesn't seem to be an assembly guide which seems a little weird. Not entirely necessary, but there seems to be a handful of hair parts. Not sure at this moment how they go together. Could be a problem. But I'm not going to worry about it now. I don't want to work on resin in my apartment and the weather will suck by the time I finish my currently project, it's going to be a while until I get to this. Expecting another kit in the mail this week, so until then...


Monday, September 26, 2011

Weekly WIP - MG Strike Freedom (Part 3)

What I'm working on...
So I didn't get much work done this week due to some work obligations and lousy weather. I did however start work on the waist. Specifically the guns. 


As you can see there's a nice big seam line right down the middle which needs to be removed. There's two ways to do this. 

Approach 1 - Mask, paint, repeat for each color (there are 5 colors for this section).
Approach 2 - Alter the parts so they can fit together after the seam line is sealed.

Since I'm doing a fixed pose, I went with the second one. Opening the white armor parts it's fairly obvious how to modify the grey parts.


The next part was to separate the grey and gold parts. Although it was an easy modification, it wasn't as obvious. Clearly the parts that go around the pegs just required a bit of cutting. The tricky part was addressing the sliding gimmick. My solution was to lay the parts out and fully extended. Then I used putty to fill in the hole for the sliding gimmick. Then I cut the other end out. When I do final assembly I'll probably have to glue these parts together.


What was the end result?


Looks the same to me. Well I've got some priming and painting to do now on the waist and base. Looking forward to that.

What else I'm into...
Darren McFadden and the Oakland Raiders! Been really tough to be a fan for much of the past decade, so a 2-1 start (that should have been 3-0!) including an upset victory over the Jets has made me quite happy. Hopefully they can keep this up.


Saturday, September 24, 2011

What's in the box? - Clare

So I've ordered a few resin kits and the first arrived today. It's a figure of Clare from the series Claymore (purchased from e2046). I saw the anime series a while back and I really liked it. Well until the end. I could sort of deal with the story spiraling out of control because that happens all the time in anime. What I can't deal with are things not finishing.  It's the same reason I'm not a fan of Berserk. Anyways, I'm getting off track. Back to the kit. I've never bought a resin kit before, so this is the first time I've seen what it comes with.

Here's the box.


Comes with some papers. 2 are in a language I can't read. The other is in English. It basically says what to do if there are missing parts, how to do some modeling basics, and some other stuff that isn't really important.


The other sheet has the parts and how to assemble the kit.


Also comes with a card that shows the painted figure.


I'm not familiar with the color scheme. I'm not going to do that. I'm going with the anime colors.


Here are the parts. All of them seem to be there and intact. Well mostly intact. There does appear to be a part broken on the cape where the sword can go. But I'll be going with the pose above so I don't really care. Should be a fairly easy fix.


Bonuses!
So there are two things I really like about the kit. You get two right arms. You get the original and Irena's. Nice touch if you're familiar with the series.


The other part I like is that there is not only do you get a base, there's some pretty nice detail on it. Being someone that doesn't like plain bases, I really appreciate it.


Well that's it. Since it will be winter by the time I finish my current project, I probably wont get to any resin kits until the spring. This isn't actually a bad thing. Was hoping to get this earlier, but pre-ordering of resin kits can be fairly unpredictable. I ordered a total of 6 kits. Took over 2 months to get this one. 2 of them are in the mail. I'll do unboxings on those when I get them. The others I'm still waiting on. Links for the ones I'm still waiting for are below.

Kaguya Nanbu - (http://www.e2046.com/product/10113)
Kanu Unchou 2020 - (http://www.e2046.com/product/11517)
Psylocke - (http://www.e2046.com/product/11533)


Tuesday, September 20, 2011

Tips and Tricks - Masking

So I've always had some issues with masking, but I'm getting better. Thought I'd share a few vids with tip and tracks from masking. Sure these vids are for model cars, but the info applies to gunpla too.

The first 2 vids are from TheRocketSilo. The first one explains what too look for in a tape. The second one gives some suggestions and alternatives.


The next set of vids is from Doctor Cranky (damncranky66 on youtube). I'm going to guess most gunpla builders haven't seen his vids since he only does model cars, but he's got tips and tricks that apply to gunpla too. If you're into weathering or really shinny candy coats, he's someone you need to follow.


Lastly, another Doctor Crank vid. Just wanted to leave you guys with some things to think about for your next paint job.


Monday, September 19, 2011

Weekly WIP - MG Strike Freedom (Part 2)

What I'm working on...
Put some work in on the base. Didn't go as well as I would have liked. Added some milliput to fill in the holes. Followed that up with some sanding. The I hit it with some primer. The result? Not what I wanted. 


Clearly that's not going to do. Sanded out the spots where the primer splattered. Looks ok. Needs a little little primer to fill in some spots. I also put some filler putty in to fill in the cracks. Hopefully this will solve the problem. Still need to sand that down. Expect a pic next time.

Since that didn't go well I started with some color sampling. Painting is my favorite part, so I was hoping this would cheer me up. At first I was really psyched. The red and lighter blue were looking really good. The grey is close, but it looks like it needs a little blue and probably some white. No big deal.


Then I got to the dark blue. That's were things took a turn for the worst.


It totally clogged my airbrush. So annoying. After some experimentation, I figured out the problem. This paint MUST be thinned with water and nothing else. It recommends 4 parts paint to 1 of thinner (aka water). That's what I did to get this.


Color looks good, but the paint still wasn't cooperating. It was splattering all over the place. So I think I'm going to need to thin it 4 to 1.5 or 2 to 1. It also has some red spots. Not sure what that's about. These spots/streaks are much more evident where I applied some Future. Going to need to play with that a little more before applying it to actual pieces.

That's all for now. I think I'll be able to fix base and start painting it. With that on the way to being done, I guess it's time to examine the waist (aka the first parts to go on the base).

What else I'm into...
The seventh season of How I Met Your Mother starts tonight. Since it's one of my favorite shows, I am quite psyched for this. I get the sense my theory of Norah being the mom will be crushed, but that's ok. I'll just have to come up with a new one. Check out the promo vid for the season premier here.

For any fans of amazing guitar work, check out the album Dechristianize by Vital Remains. Dave Suzuki is an amazing guitar player. I understand that some may be turned off by the lyrics and themes but give it a chance. Check out the title track below. It's 8 minutes of awesome.


Tuesday, September 13, 2011

What's in the box? - Bandai Decal Package

I've often wondered what's in a Bandai decal package, but haven't really been able to find out. I've never used decals before, but since I'm building a MG Strike Freedom and want it to look great, I ordered some. This is what the package looks like.


It's surprisingly small. I don't know why I thought they would be bigger. Obviously they are 1/100 in scale, so of course they're small. The decal sheet itself is 4 x 5.5 in. So what's inside?


Not much really. You get a sheet of decals (front and back below)...


and the backing with directions on how to apply the decals (in Japanese of course). 


There are no directions of where to place them. Other than two very small pictures there are no references on where to place things. In the instruction manual for the MG Strike Freedom there is information on where to place the decals. At first glance it appears that there are more decals on the sheet than in the instruction booklet. Won't know if that's the case until I finish the kit, but I'll be sure to update this post when I get the answer. Hope this was helpful.

-Mike

Sunday, September 11, 2011

Weekly WIP - MG Strike Freedom (Part 1)

I feel like I'm not putting enough into the blog... even though I just started. So I've decided to change things a bit. I'm going to continue the weekly WIP updates, but periodically/randomly I'm going to have other gundam/gunpla posts. Mostly be announcements, tutorials, news, and the occasional opinion.

What I'm working on...
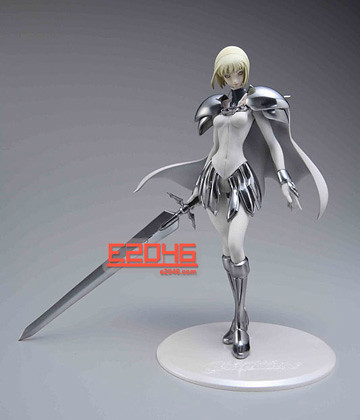
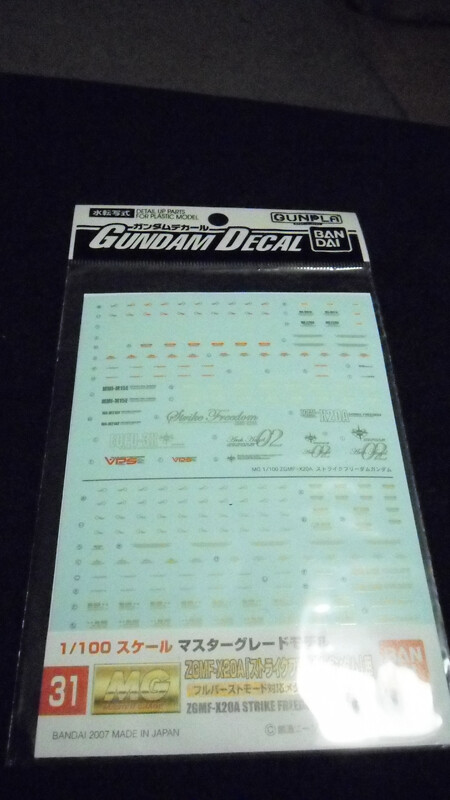
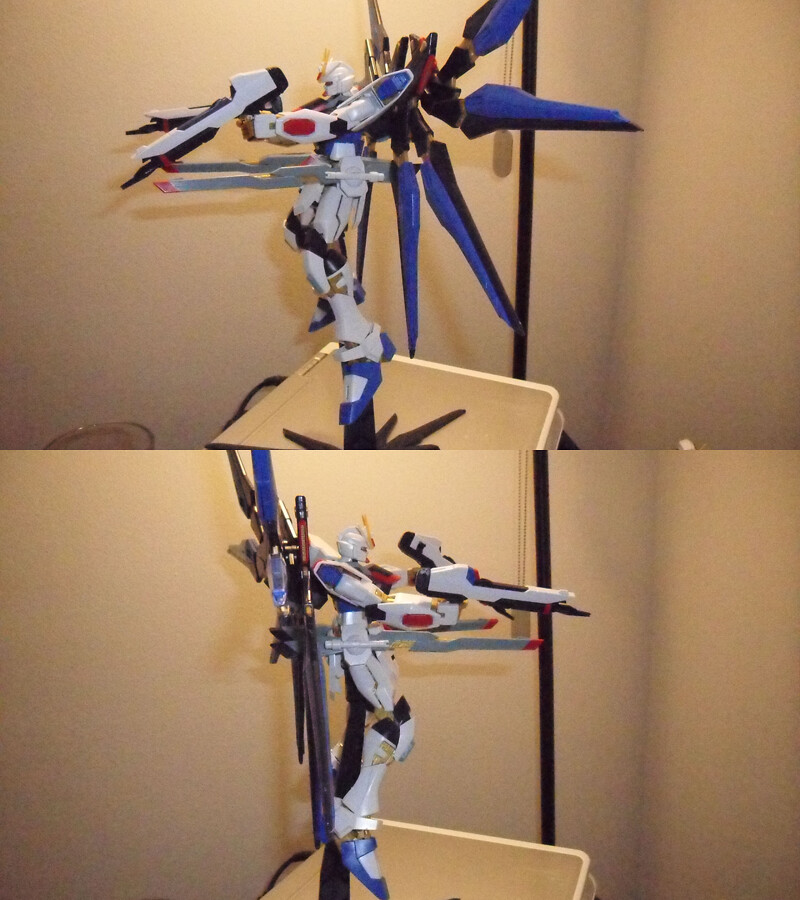
This week I began building my MG Strike Freedom. Wasn't really a fan after watching Destiny. It was a little too powerful. It's like the Superman of mobile suits. Not interesting to watch someone that can do everything. But then a year or so ago I was playing Dynasty Warriors Gundam 2 and was forced to use it. After playing a few missions, it started growing on me. I became interested in the poses, moves, weapons, etc. Although I became a fan, I still had no desire to get the kit. Then I saw the Perfect Grade. It looked amazing. However, I can't justify spending that much on a single kit... At least not yet. So I settled for the Master Grade.

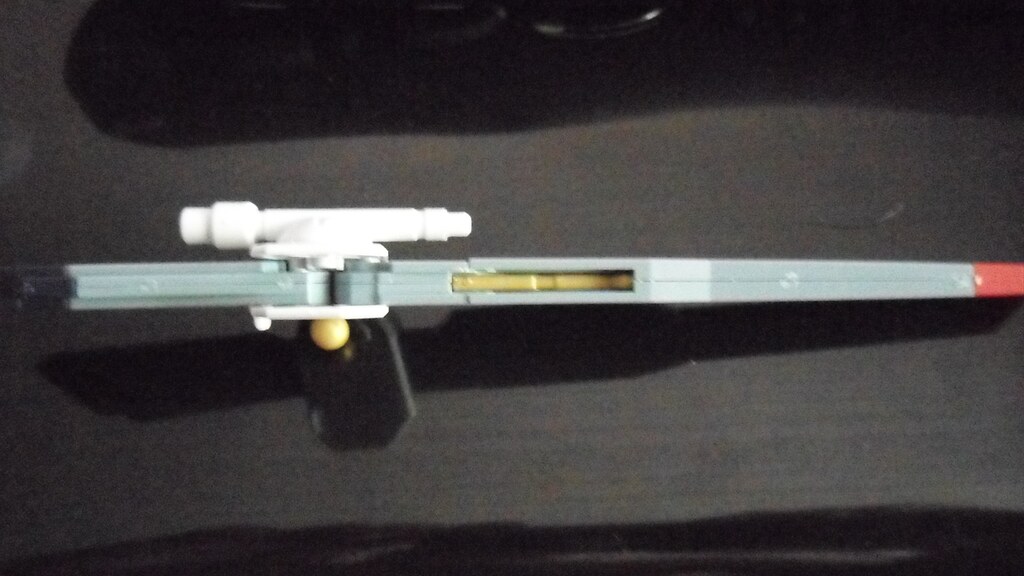
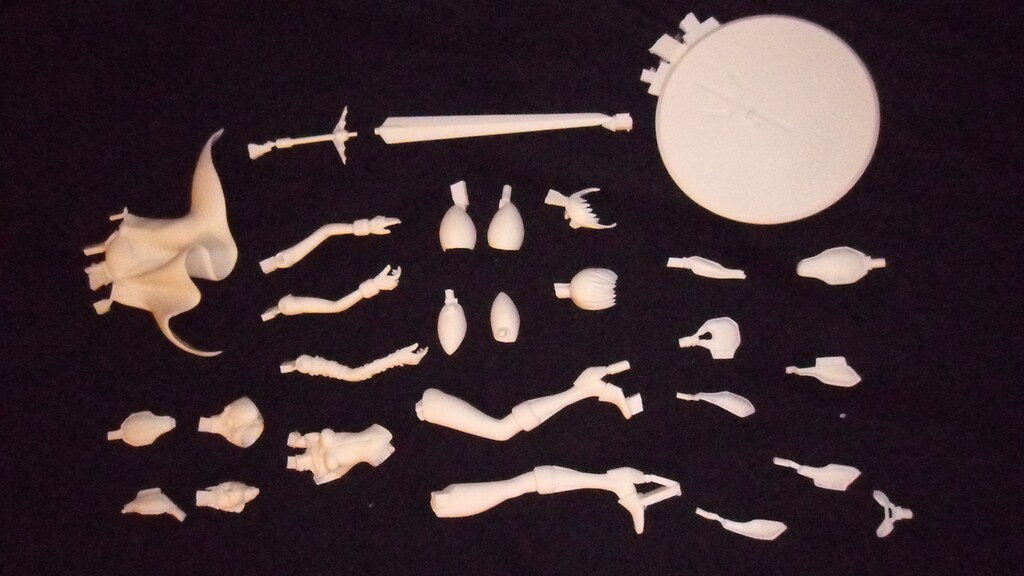
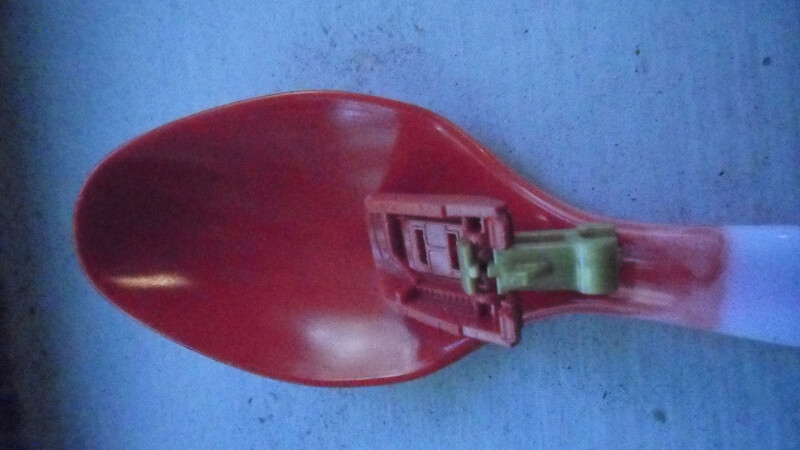
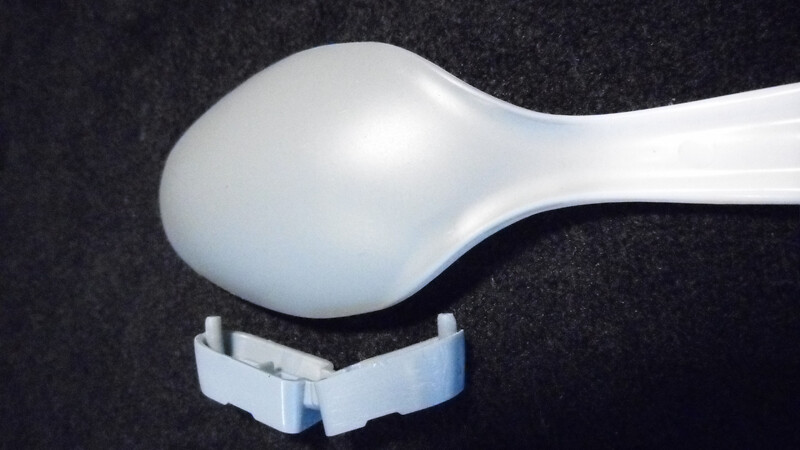
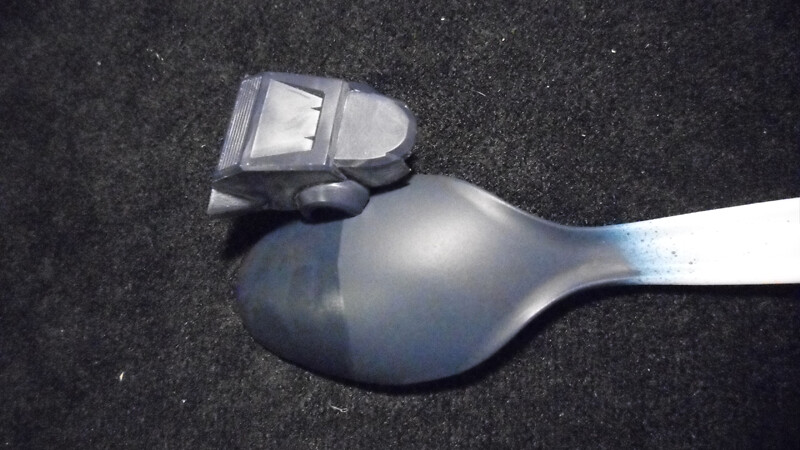
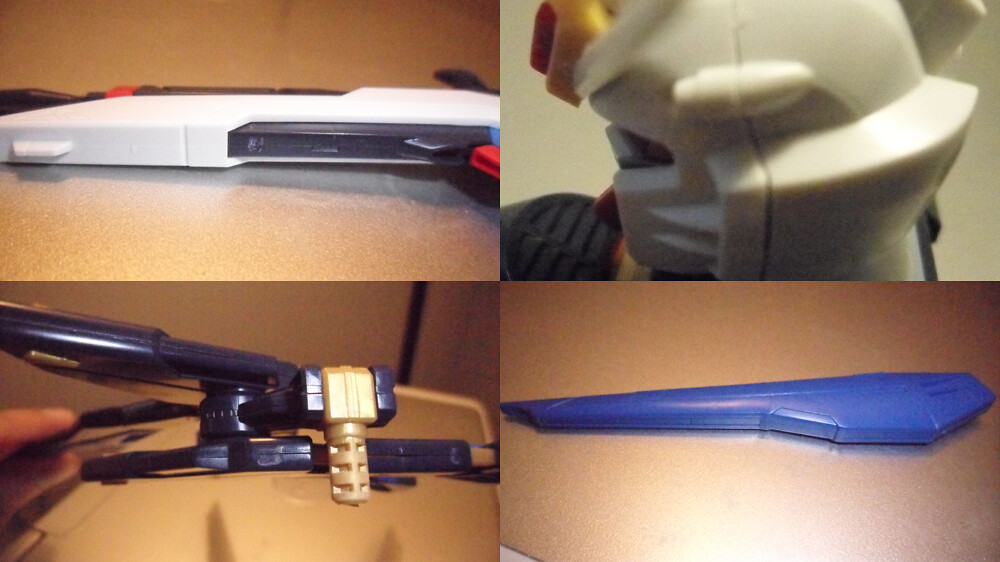
After snapping the kit together I'm pretty pleased. For the most part I've only ever built 1/00 HGs and NGs so maybe I'm easily impressed. There are a few issues though. The right arm is really loose so it doesn't stay put. The same goes for the wings on the right side. Also, the left gun doesn't fit in the peg on the hand. This is kind of annoying, but I'm not just snapping this kit so those issues will be resolved. Below are some images of the kit snapped together.


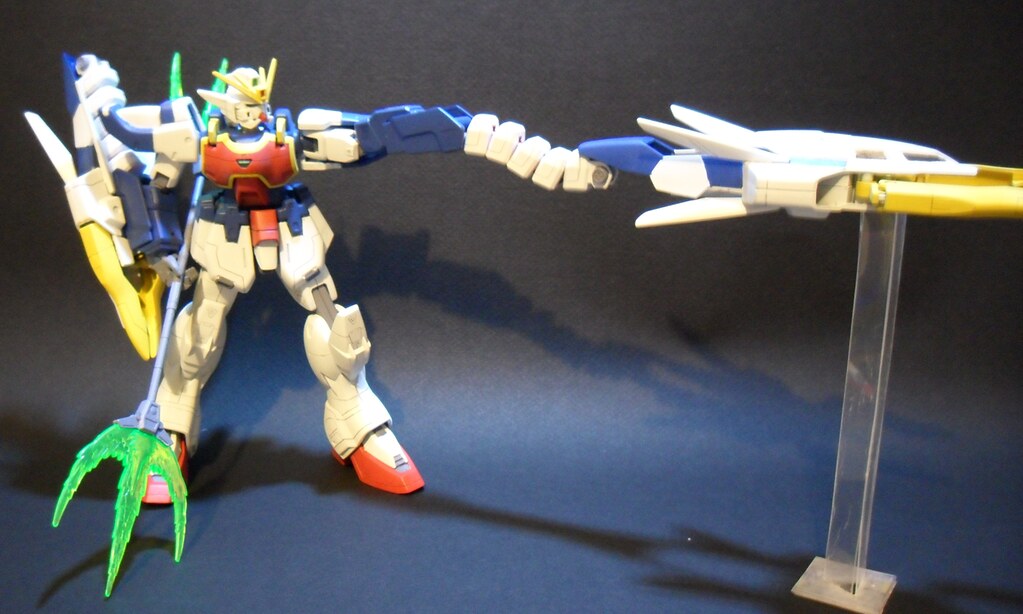
For those wondering, that is the pose I'm going with. I don't like putting my kits in a bunch of different poses after they are painted. I really tend to leave the kits alone once they are on the shelf. With this in mind, all mods I do will be to help with the assembly and painting. I'm going to be showing all of the steps I will go though to build this kit. Some things are ideas I'm trying out. Others are techniques and tricks I've picked up from the MAC Forum or youtube. Now on to building the kit!

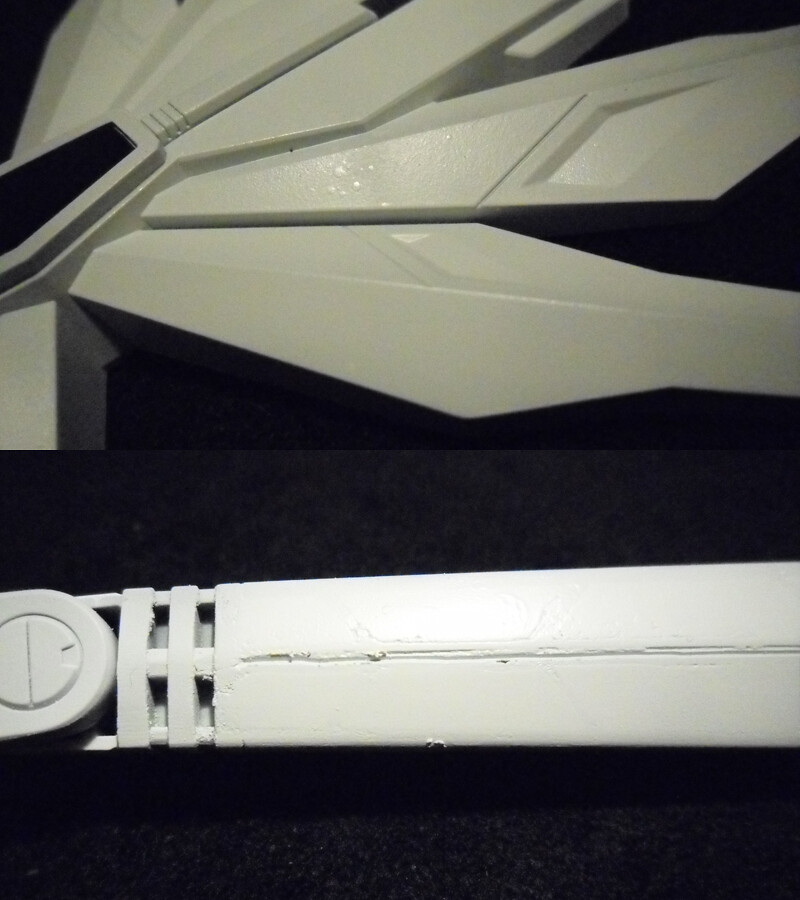
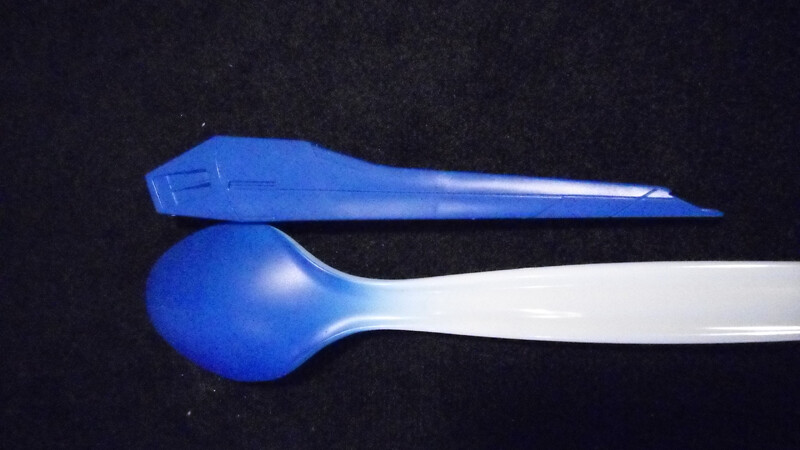
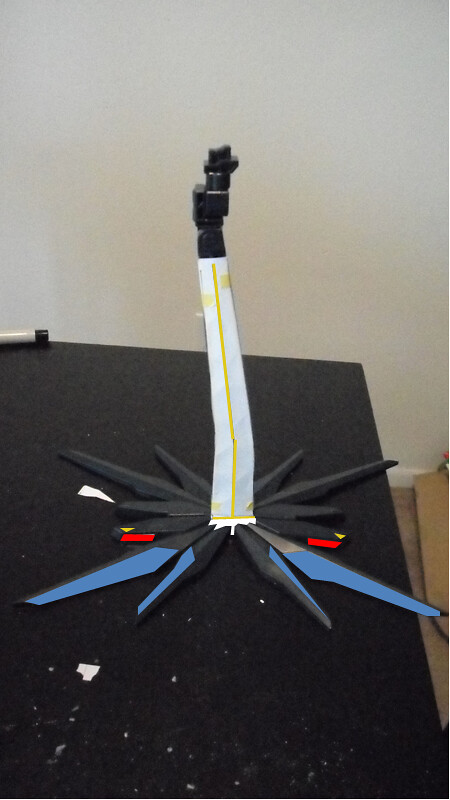
I'm starting with the base. If I'm going to be able to keep the kit in the pose above, I need to have the base for it to sit on. Since the base is in the shape of the wings, I'm going to paint it like the wings. As for the stand I'm going to put pla plate over it, leaving the stripe down the middle. I'll be painting the stand white and the stripe down the middle gold (see the image below).


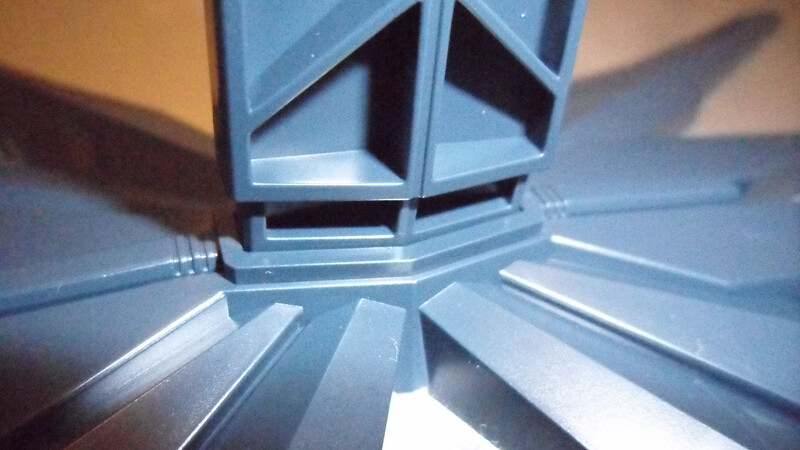
First issue is that the stand doesn't fit in the base. Not a major issue. Just needs a bit of sanding. I'll probably glue it in once it's painted to make sure it's nice and sturdy.


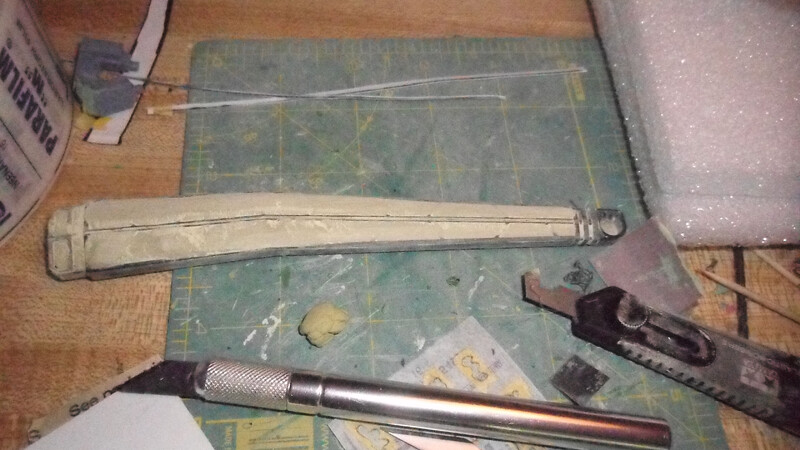
The next part is to address is covering the sides. This didn't go well. For my first attempt I tried using pla plate, but there were two issues. 1) I couldn't get the shape I wanted. The shape had to fit exactly and with the curves in the stand I just couldn't get shape perfect. 2) The hollow areas caved in a bit. So after that failed experiement, I tried milliput. Seems to be working. It's going to require a lot of sanding. Almost got half of one side done. And it only took 45 minutes :(


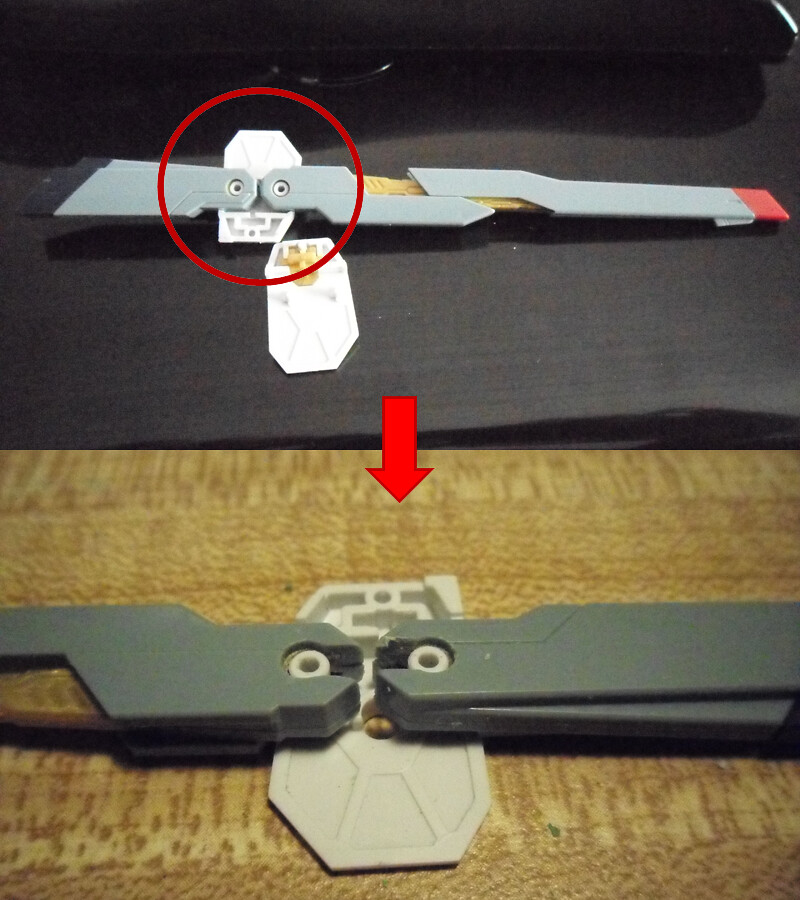
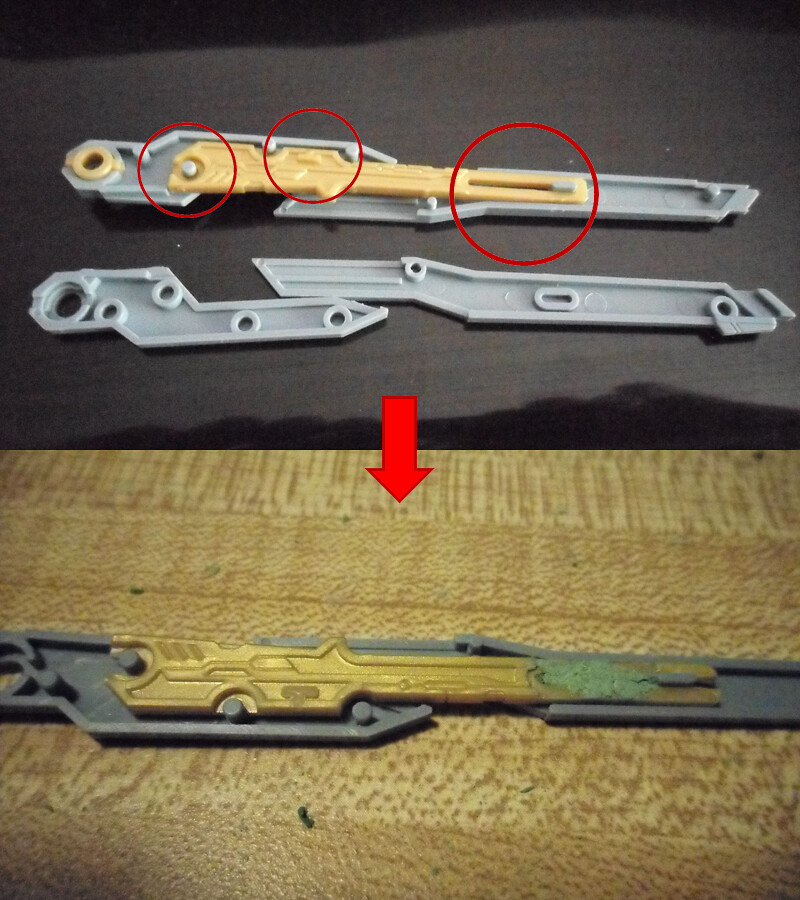
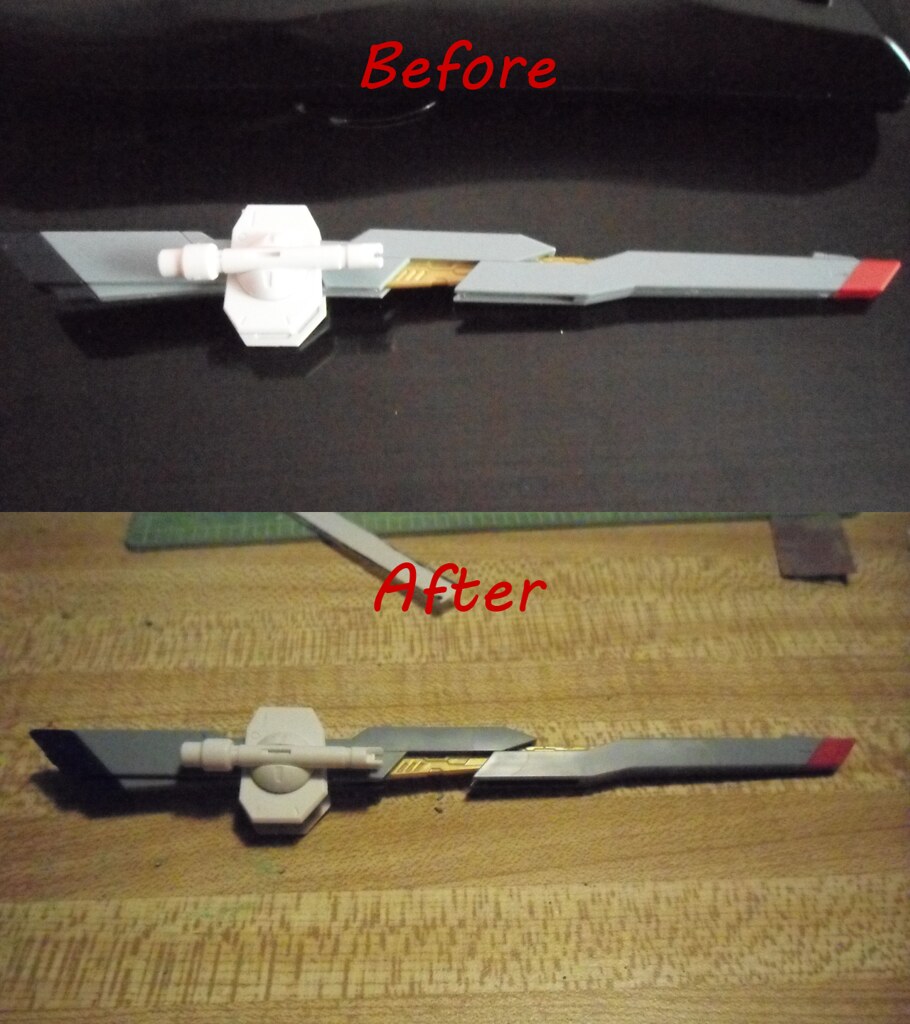
Looking ahead, there's going to be a lot of seam line issues to address. Since the waist is the first part going on the base, I'll be planning how to remove the seam lines on this section. At first glance, it appears the guns on the waist appear to need the most work.


What else I'm into...
Picked up issue #4 of Jennifer Blood. She's no Punisher, but it's a pretty good read. Ninjettes! Plus I love Garth Ennis books. If you've never read The Preacher, his run on The Punisher, The Boys, or The Crossed, you really should. Very intertaining and like nothing you'll ever read or expect to read in a comic.


The Tony Kornheiser Show is back after a summer away. For those that don't know it's a light and comical sports talk show. Outside of touching on major sporting issues, there's also talk about what's on TV, the animal revolution, weather, and Tony's life among other things. If you're interested, you can check out the podcast here or on itunes.

Well that's all for now. See you guys next week.

Sunday, September 4, 2011

Introduction

Today I decided to start a blog to share my experience with model building. Why? Well I've discovered there's not much on the experiences of someone learning the basics. I envision this blog as a tool to help those wanting to get in the hobby and hopefully included a few things that can help even experienced modelers.

How I got started...
To this point, my modeling has been based around building Gundams. I've been building off and on for the past 10 years. Like many starting at that time, my journey into Gunpla began with Gundam Wing. Loved the show. Still do. On a trip to the local Toys-R-Us I stumbled upon a 1/144 NG Deathscythe Hell. Since this was my favorite design from the show, I had to get it. Went directly home and spent an hour or so putting it together. I was not equipped to build it, but some how I got it together. I was very pleased with my work. And of course I needed to get all of the other kits. While building the Heavyarms (me second kit) I realized how badly these kits need paint. That's when I started painting them. Also stated using tools like clippers to remove the parts from the runners and some sanding sticks to remove the nubs. Became really happy with the outcome. Except for some experiments with spray painting, that's more or less how I built my kits for the next 9 years...

That's when I stumbled across Kamm's youtube channel (here). I found his work amazing. And after watching his inspiration videos, I was no longer pleased with my work. I had no idea how much could be done. From that point on, I decided had to step things up. Since this revelation, I started practicing some scratch building and moding on an old 1/100 HG Serpent Custom. Never finished it, but it became a good learning experience. After that I got an airbrush and built a 1/100 HG Nataku (pic). I was happy with the plan, but the execution left plenty to be desired. Which takes me to now and my build off with Meads. You can check out the WIPs on the MAC Forums (here).

What's the plan for this blog...
I'm planning for this blog to be updated weekly with the progress I've made on any project I'm working on. I plan to cover everything. The kit, tools, paints, techniques, and influences. Although nearly every project will probably involve Gundams, there will probably be one every now and then that doesn't. Next week I will kick off this blog with a new project. This new project will be the MG Strike Freedom. I'll be giving more detail on why I'm working on this kit next week. Broke it out of the box the other day and I'm quite exited. Gunpla has come so far since I first started.

I'd also like to involve the readers of this blog to be involved. I will ask for help on everything from color scheme to which project to work on next. I would also appreciate any feedback or critiques on the projects I'm working on. If it can be arranged, I'd also like to get some guest post of experiences of reader and people that influence me. Everyone has a different take on how to build models and I like to hear there stories. Lastly, if anyone has suggestions on how to improve the blog I'd love hear them. I want to make this not just an enjoyable experience for me, but for those that read.

Lastly, I plan to finish each entry I want to comment about non-modeling activities that have my interest. Although I love gunpla, it's not my whole life and I want to share those other experiences as well. Hopefully it will give some further insight into how and why I build models. I will place it at the end so if you aren't interested you can stop reading.

What else I'm into...
Don't waste your time going see Apollo 18. Don't worry I'm not going to spoil the movie. I'll just say it didn't work for me. Maybe it's because I love all things space, but there's more than a few plot holes that don't get resolved or don't make sense.

I also started playing Torchlight on Xbox360. Seems like fun through the first 10 dungeons. Not sure it will keep my interest until the end though. I think it's be a combination of so so story and lack of meaningful rewards for completing side quests. But for anyone wanting to check it out, don't pick a Chakawary as your pet. It looks cool, but it's unbelievably annoying.

Well that's all for now. See you guys next week.